安全启动
安全启动是UEFI规范的标准功能,通过对系统启动中的各个组件进行逐级签名验证,实现启动过程的完整性和真实性保证。Linux系统的UEFI安全启动主要包括以下三个流程:
BIOS通过内置证书验证shim组件的签名信息; shim组件通过内置证书验证grub组件的签名信息; grub组件通过shim组件提供的接口验证kernel组件的签名信息。 OpenCloudOS对EFI签名工具(pesign及其算法库nss)和shim进行了国密算法扩展支持,即支持使用SM3算法进行EFI文件的哈希计算,使用SM2数字签名算法进行EFI文件的签名/验签,从而建立基于国密算法的操作系统启动安全保障。
因此OpenCloudOS既支持非国密算法(RSA等)的安全启动,也支持国密安全启动
约束限制
- 需要基于支持UEFI安全启动的arm64/x86物理机运行;
- pesign工具最多支持二级证书签名;
- pesign工具当前仅支持生成签名,不支持验证签名。
1 非国密安全启动 (RSA)
1.1 生成密钥和证书
1.生成用于签名安全启动组件的RSA密钥和证书,shim组件由UEFI校验签名,其他组件由shim校验签名。
openssl genrsa -out rsa.key 4096
openssl req -new -key rsa.key -out rsa.csr -subj '/C=CN/ST=Shenzhen/O=Tencent/OU=TEG/CN=TencentOS'
openssl x509 -req -days 3650 -in rsa.csr -signkey rsa.key -out rsa.crt
openssl x509 -in rsa.crt -out rsa.der -outform DER
# NSS数据库以目录形式组织,存放位置可自定义
mkdir certdb
certutil -N -d certdb
# 将RSA证书导入NSS数据库,分别命名为sm2和rsa
certutil -A -n rsa -d certdb -t CT,CT,CT -i rsa.crt
# 将RSA密钥导入NSS数据库,需要先打包成pkcs12文件
openssl pkcs12 -export -out rsa.p12 -inkey rsa.key -in rsa.crt
pk12util -d certdb -i rsa.p12
1.2 UEFI文件签名
先将上述步骤涉及到的密码保存到pinfile
echo xxxxx > pinfile
pesign -n certdb -c rsa -s -i /boot/efi/EFI/opencloudos/shimx64.efi -o shimx64.efi.signed --pinfile=pinfile
cp shimx64.efi.signed /boot/efi/EFI/opencloudos/shimx64.efi
2.使用RSA密钥和证书签名grub组件并替换:
pesign -n certdb -c rsa -s -i /boot/efi/EFI/opencloudos/grubx64.efi -o grubx64.efi.signed --pinfile=pinfile
cp grubx64.efi.signed /boot/efi/EFI/opencloudos/grubx64.efi
3.使用RSA密钥和证书签名kernel组件并替换:
pesign -n certdb -c rsa -s -i /boot/vmlinuz-$(uname -r) -o vmlinuz-$(uname -r).signed --pinfile=pinfile
cp vmlinuz-$(uname -r).signed /boot/vmlinuz-$(uname -r)
4.检查签名信息,以shim和grub为例:
pesign -S -i /boot/efi/EFI/opencloudos/shimx64.efi
pesign -S -i /boot/efi/EFI/opencloudos/grubx64.efi
2. 国密安全启动
2.1 前置条件
1.系统安装不低于如下版本的支持国密的包(有安装顺序)
openssl-3.0.9-3.ocs23(包括openssl,openssl-lib,openssl-devel)
nss-3.93.3.ocs23(不大于nss-3.93-6.ocs23)
pesign-116.3.ocs23(不大于pesign-116-6.ocs23)
git clone https://gitee.com/opencloudos-stream/shim.git
cd shim && wget https://github.com/rhboot/shim/releases/download/15.7/shim-15.7.tar.bz2 #这里是下载15.7的tar包,用于后续rpmbuild
3.安装shim编译要用的软件包
yum install elfutils-libelf-devel gcc gnu-efi gnu-efi-devel make git rpm-build
cat /etc/crypto-policies/back-ends/nss.config | grep SM3
nss.config 添加SM3
config="disallow=ALL allow=HMAC-SHA256:HMAC-SHA1:HMAC-SHA384:HMAC-SHA512:CURVE25519:SECP256R1:SECP384R1:SECP521R1:aes256-gcm:chacha20-poly1305:aes256-cbc:aes128-gcm:aes128-cbc:SHA256:SHA384:SHA512:SHA224:SHA1:ECDHE-RSA:ECDHE-ECDSA:RSA:DHE-RSA:ECDSA:RSA-PSS:RSA-PKCS:tls-version-min=tls1.0:dtls-version-min=dtls1.0:DH-MIN=1023:DSA-MIN=2048:RSA-MIN=2048:SM3"
2.2 生成密钥和证书
1.生成用于签名shim组件的密钥和证书,shim组件由BIOS校验签名,由于当前大部分BIOS不支持国密算法,此处选择使用RSA算法,如支持国密算法,可按照步骤2生成SM2密钥和证书:
openssl genrsa -out rsa.key 4096
openssl req -new -key rsa.key -out rsa.csr -subj '/C=CN/ST=Shenzhen/O=Tencent/OU=TEG/CN=OpenCloudOS'
openssl x509 -req -days 3650 -in rsa.csr -signkey rsa.key -out rsa.crt
openssl x509 -in rsa.crt -out rsa.der -outform DER
openssl ecparam -genkey -name SM2 -out sm2.key
openssl req -new -sm3 -key sm2.key -out sm2.csr -subj '/C=CN/ST=Shenzhen/O=Tencent/OU=TEG/CN=OpenCloudOS'
openssl x509 -req -days 3650 -signkey sm2.key -in sm2.csr -out sm2.crt
openssl x509 -in sm2.crt -out sm2.der -outform der
3.建立NSS数据库,并将以上两步骤生成的密钥和证书导入NSS数据库:
# NSS数据库以目录形式组织,存放位置可自定义
mkdir certdb
certutil -N -d certdb
# 将SM2证书和RSA证书导入NSS数据库,分别命名为sm2和rsa
certutil -A -n rsa -d certdb -t CT,CT,CT -i rsa.crt
certutil -A -n sm2 -d certdb -t CT,CT,CT -i sm2.crt
# 将SM2密钥和RSA密钥导入NSS数据库,需要先打包成pkcs12文件
openssl pkcs12 -export -out rsa.p12 -inkey rsa.key -in rsa.crt
openssl pkcs12 -export -out sm2.p12 -inkey sm2.key -in sm2.crt
pk12util -d certdb -i rsa.p12
pk12util -d certdb -i sm2.p12
2.3. 编译shim组件
1.进入shim源码目录,修改shim.spec中的配置变量,开启国密算法支持,并指定内置SM2证书(上述步骤生成):
%global enable_sm 1
%global vendor_cert /path/to/sm2.der
rpmbuild -ba shim.spec --define "_sourcedir $PWD"
3.卸载原来的shim包,安装编译完成的shim软件包:
yum localinstall ~/rpmbuild/RPMS/x86_64/shim-xxx.rpm
2.4. UEFI文件商密签名
先将上述步骤涉及到的密码保存到pinfile
echo xxxxx > pinfile
1.使用RSA密钥和证书签名shim组件并替换:
# x86架构
pesign -n certdb -c rsa -s -i /boot/efi/EFI/opencloudos/shimx64.efi -o shimx64.efi.signed --pinfile=pinfile
cp shimx64.efi.signed /boot/efi/EFI/opencloudos/shimx64.efi
# x86架构
pesign -n certdb -c sm2 -s -i /boot/efi/EFI/opencloudos/grubx64.efi -o grubx64.efi.signed -d sm3 --pinfile=pinfile
cp grubx64.efi.signed /boot/efi/EFI/opencloudos/grubx64.efi
pesign -s -n certdb -c sm2 -d sm3 -i /boot/vmlinuz-$(uname -r) -o vmlinuz-$(uname -r).signed --pinfile=pinfile
cp vmlinuz-$(uname -r).signed /boot/vmlinuz-$(uname -r)
pesign -S -i /boot/efi/EFI/opencloudos/shimx64.efi
pesign -S -i /boot/efi/EFI/opencloudos/grubx64.efi
pesign -S -i /boot/vmlinuz-$(uname -r)
3.安全启动
进入BIOS,导入shim组件的签名证书,并开启安全启动选项。不同的BIOS操作方法不同:
3.1 将签名shim组件的RSA证书放入/boot/efi/EFI/opencloudos目录下:
cp rsa.der /boot/efi/EFI/opencloudos
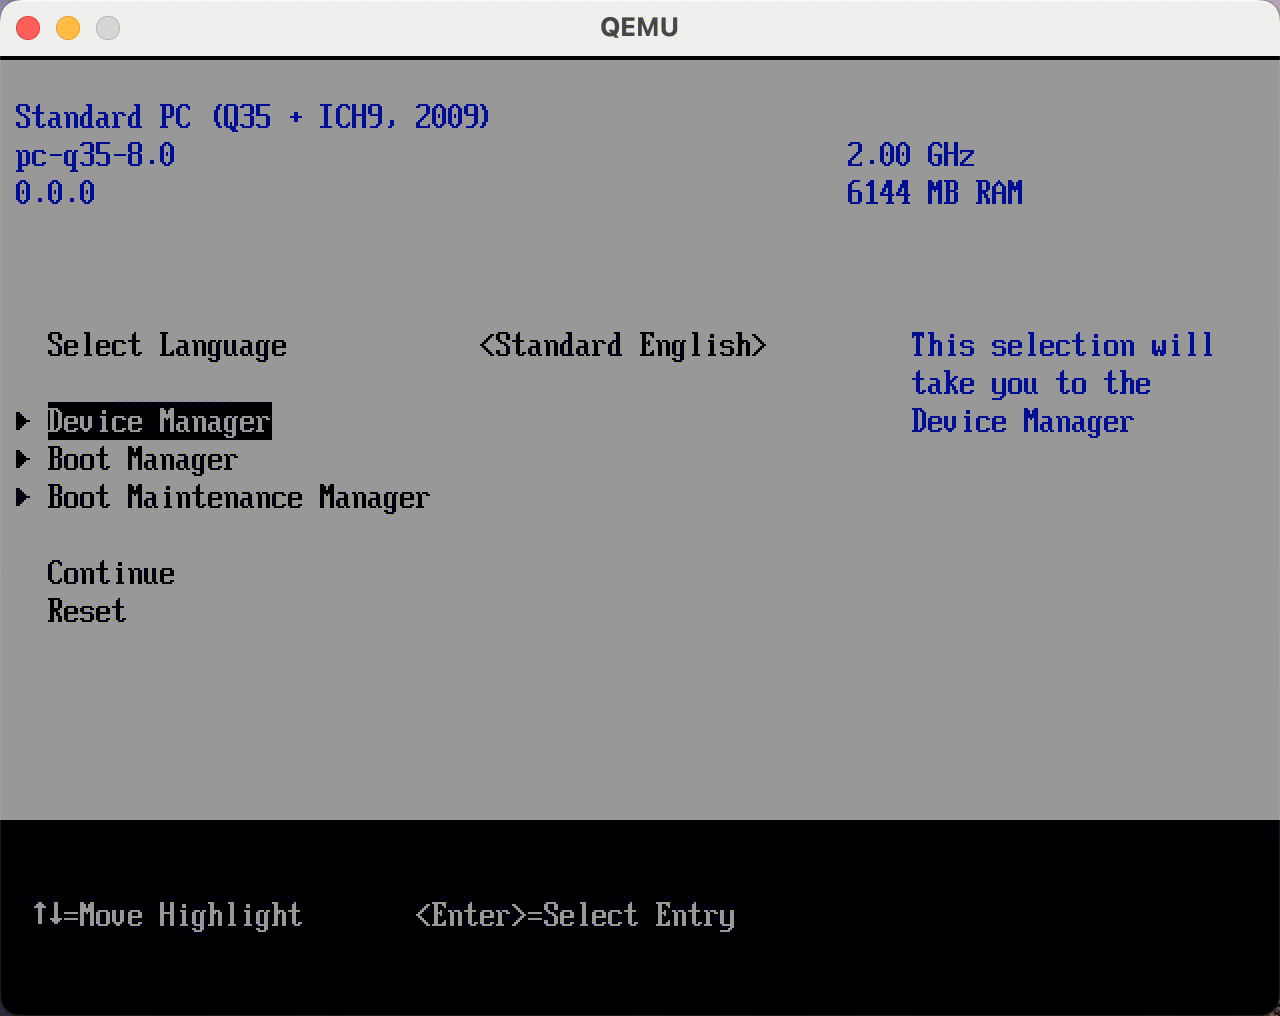
3.2 重启系统, 进入BIOS配置界面开启安全启动
配置路径:
Setup->Device Manager->Secure Boot Configuration
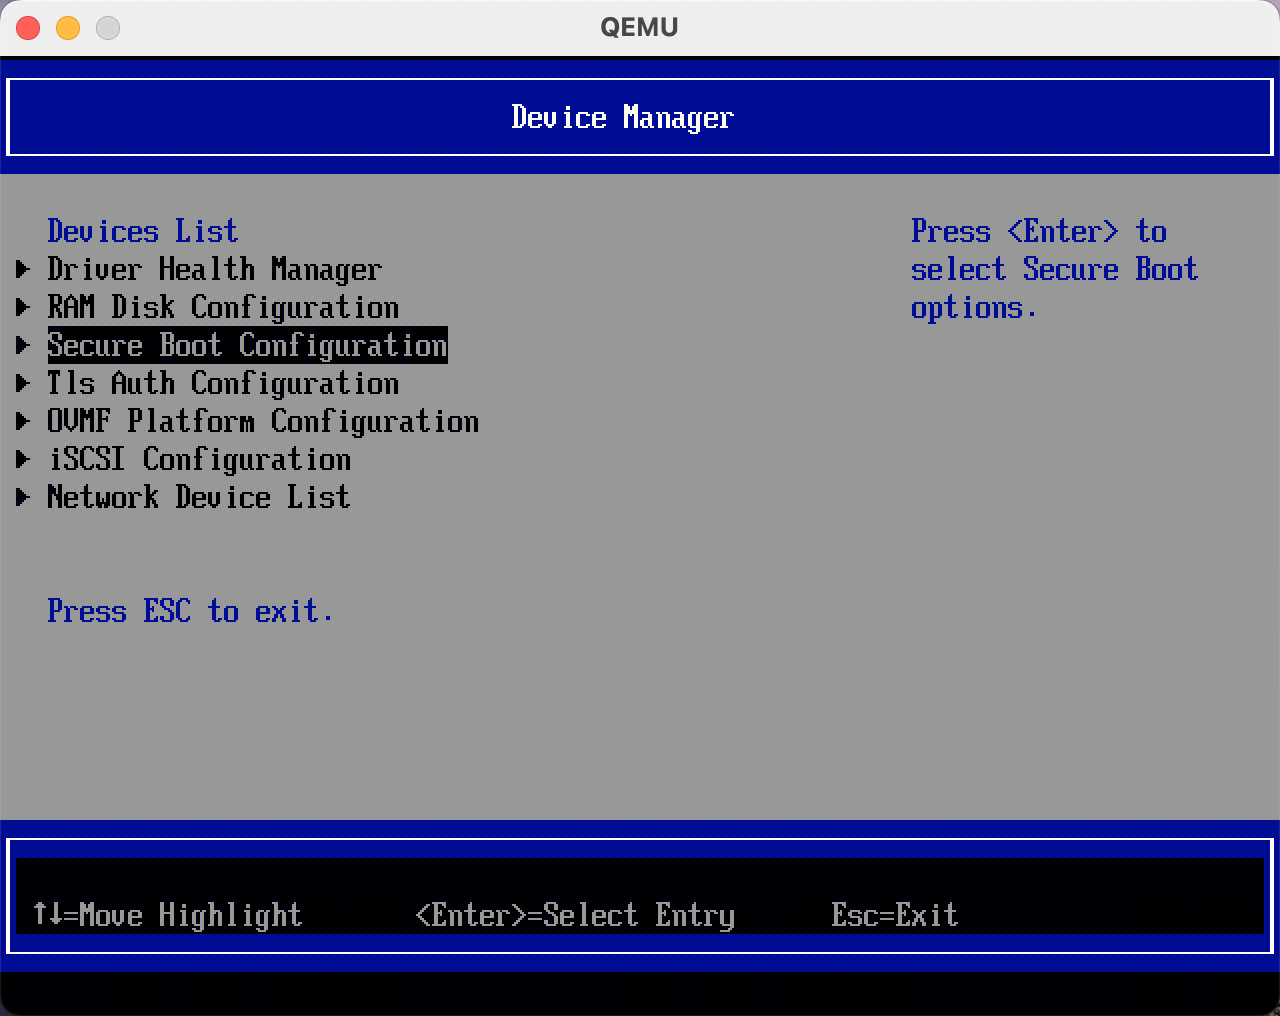
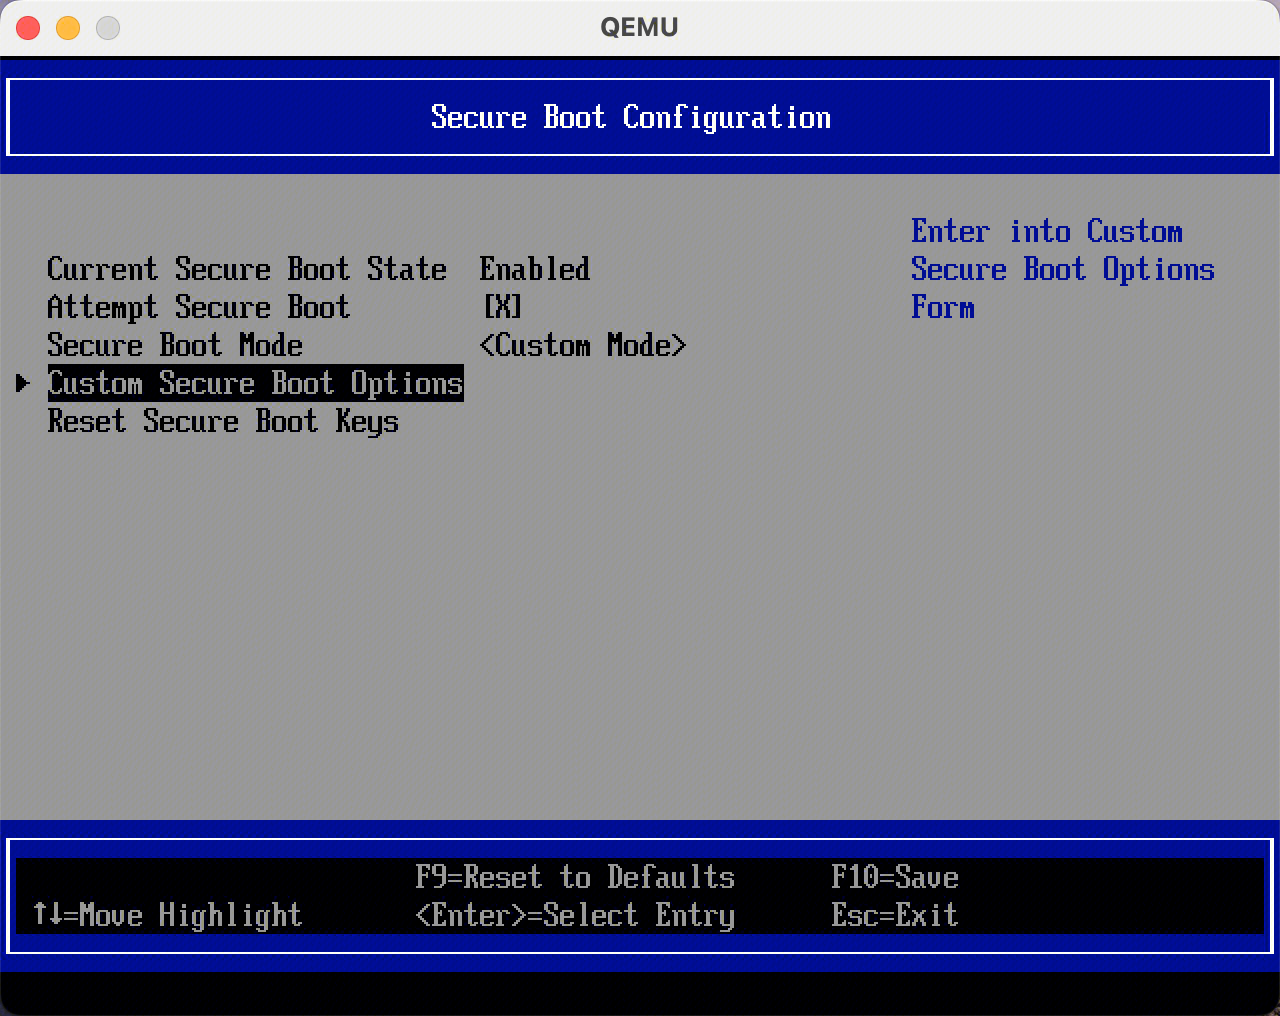
3.3. 配置安全启动为自定义模式
配置路径:
Setup->Device Manager->Secure Boot Configuration->Custom Secure Boot Options
Current Secure Boot State默认是disabled,并且Attempt Secure Boot开关无法打开。
我们需要将 Secure Boot Mode从Standard Mode改成Custom Mode,然后进入Custom Secure Boot Options,如图所示
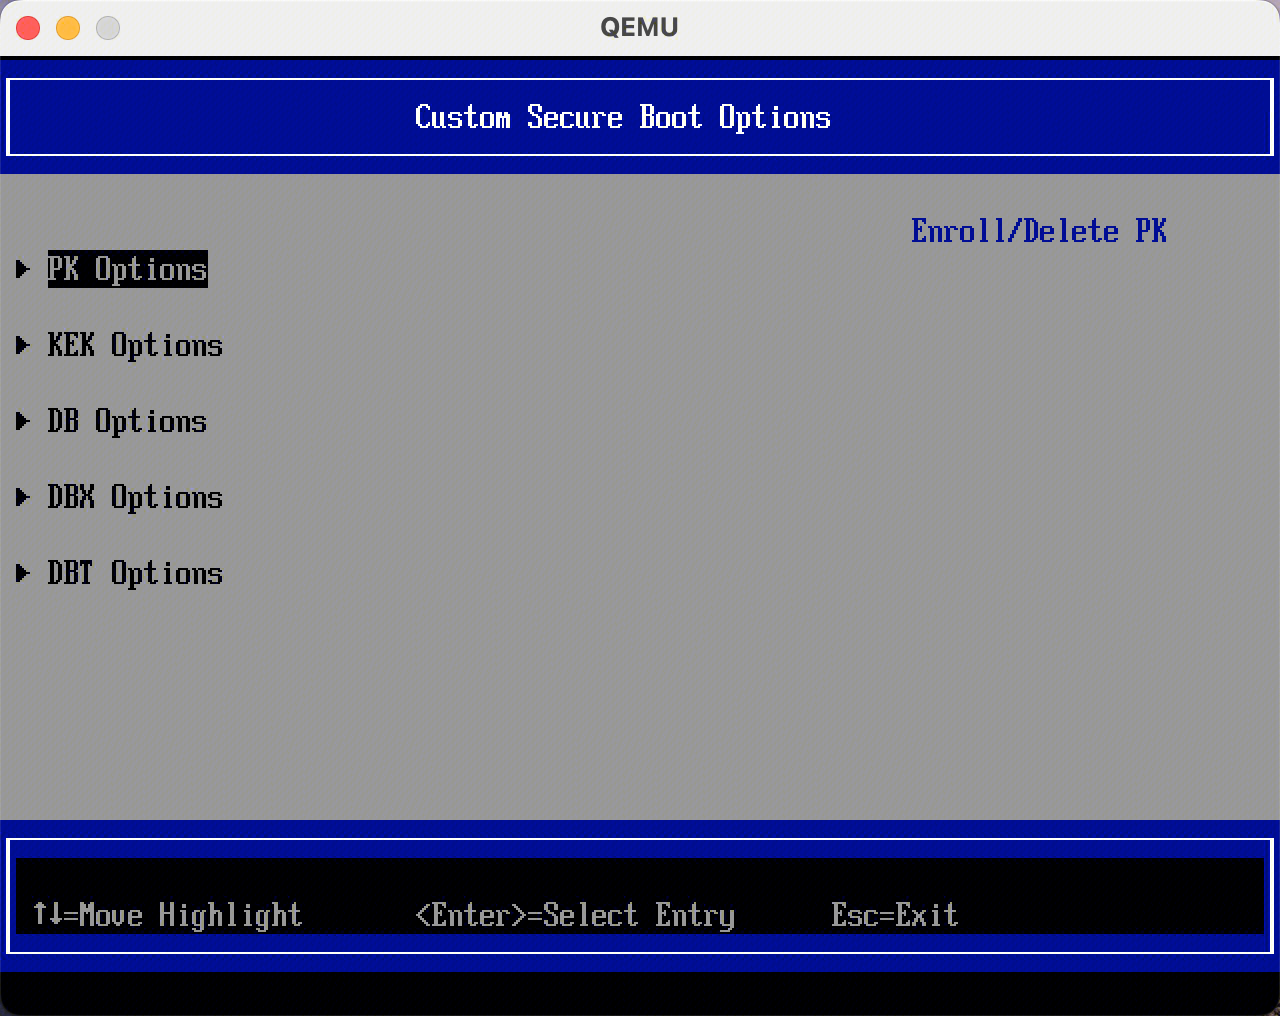
3.4. 导入安全启动证书到PK和DB中(PK为空时无法开启安全启动),配置路径:
Setup->Device Manager->Secure Boot Configuration->Custom Secure Boot Options->PK和DB相关选项->导入签名->进入目录opencloudos->选择rsa.der->保存并退出
3.5. 保存配置后重启系统,系统启动成功,查询安全启动状态为开启:
mokutil --sb-state
SecureBoot enabled